Welcome to the final stage of your music producing adventure. You’ve finished a killer tune and want to send it to the mastering engineer, or perhaps even master it yourself. Understanding essential factors such as headroom, gain staging, compression, peaks, and others are vital for ensuring that the mastering engineer is able to get out the maximum of your sonic potential.
What is a Pre-Master File?
A pre-master file is the final version of the track or mixdown that is sent to the mastering engineer. The mastering engineer uses this specific file to create the master file for further distribution. Depending on the distribution medium, multiple master files may need to be created, as different media have specific requirements.
In essence, the pre-master file is nothing more than the export of the final mix of the project, taking into account certain points that are crucial for the mastering engineer. Let’s now take a look at what those points are:
How to prepare your track for mastering?
The mastering engineer makes a series of small adjustments to the track. You can read about the specifics and tools used in mastering in my brief overview of ‘What is mastering’ here. At the end of the process, the track is brought to its “final volume.” The mastering engineer achieves this primarily through the use of compression and limiting, requiring sufficient “headroom and dynamics” to work effectively.
Headroom
Headroom is defined as the space between the loudest peak and the clipping threshold.
Clipping occurs at higher volume levels when the system reaches its capacity to accommodate a high signal level, resulting in severe distortion. In analogue systems, this distortion is frequently caused by the signal level surpassing the voltage levels of the power supply. It occurs in digital systems when the coding format’s available digits are exhausted
In the digital realm, this limit is set at 0 dB. Exceeding peaks beyond this threshold leads to unwanted distortion and loss of dynamics, something to be avoided. To ensure that the mastering engineer has enough headroom to work with, it has become a common practice to leave between -3 and -6 dB of headroom. For those who want to play it even safer, allowing more headroom and aiming for -12 dB is fine as well. The mastering engineer can always make the track louder, but once the upper limit is surpassed, it’s irreversible.
Gain Staging
In the era of digital audio workstations (DAWs), creating headroom is as simple as lowering the sum that accumulates in the master channel. Modern DAWs all operate with an internal 32-bit floating-point architecture, providing virtually “infinite” headroom. However, when rendering a project for mastering in 24-bit or lower, headroom becomes crucial again. If the 0 dB limit on the master track is exceeded, unwanted clipping occurs in the file, resulting in irretrievable loss of information.
In short, for mastering, it’s essential to leave enough headroom on the master sum. Loudest peaks between -3db to -6db on your DAW meter have proven to be common practice. Additionally, it is recommended not to clip individual channels in the DAW and to maintain clean gain staging. While DAWs can generally handle more headroom, there are still occasional plugins that may not, causing clipping on the individual track despite the DAW’s capacity.
Dynamics
As mentioned earlier, the mastering engineer utilizes compression and limiting among other effects, to make the track louder and appear more powerful for the listener. To compress the track effectively, the engineer needs sufficient dynamic range to work with. For this reason, when exporting the pre-master file, NO heavy compression should be applied to the master bus. Light compression on mix buses, such as kick and bass, or individual tracks for sound design, typically pose no issues. However, compressors and, most importantly, limiters should not be active on the master bus during the pre-master export, to garantee sufficiant dynamic range for the master engineer.
To properly measure the dynamic range and volume of your track, I recommend this free plugin https://youlean.co/youlean-loudness-meter/.
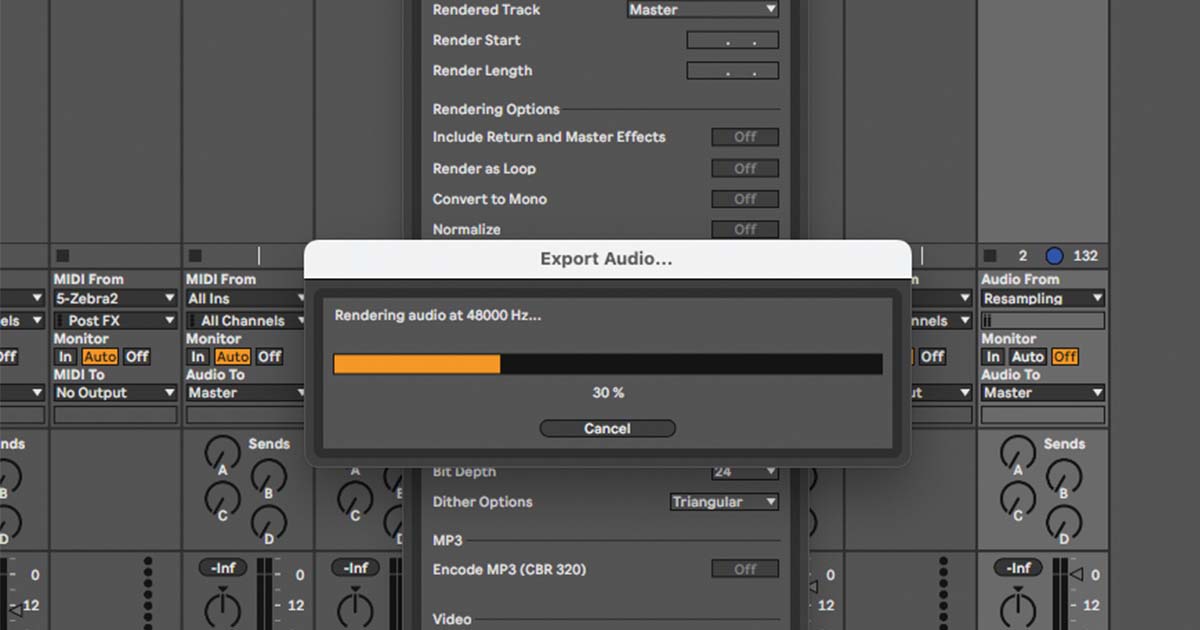
Render Format
When rendering the pre-master file, the goal is, of course, to achieve and deliver the maximum sound quality. In principle, it is advisable to render the project in the DAW with the highest possible resolution. However, since this also results in larger files, lossless formats (WAV, AIFF) with a 24-bit bit depth and a 48 kHz sample rate have proven to be a good compromise between optimal audio quality, processing power, and required storage space. Additionally, for certain media, tracks may need to be downsampled anyway, such as for CDs for example (16-bit, 44.1 kHz).
In summary, with lossless 24-bit, 48 kHz, you are definitely on the safe side for electronic music. However, make sure that your DAW is internally set to record at least at this resolution when resampling.